So, you would like to try your hand at
painting your own flower pots? Well, here are a few tips to help you along the way. No,
it's not quick and easy. But, if you follow these instructions, your flower pot will last
a long time.
Here are the steps I recommend, (in sequence), to paint
a flower pot. Use our Adobe printer friendly version
to print this page for reference while you work.
HOW
to PAINT & DECORATE a TERRA COTTA FLOWER POT
IMPORTANT NOTE:
It is essential that you seal the INSIDE of the
flower pot with polyurethane or some other waterproof sealant. If you
don't, (if used for a live plant), when you water the plant, water will
come through the terra cotta from the inside out and the outside painted
surface will bubble and peel.
Sand away any rough spots or loose clay particles on
the rim, bottom edge, and outside of the pot.
For standard flower pots, that will be used for
planting, seal the INSIDE with oil or water based polyurethane-2-3 coats-let dry. Either
of these will work but oil based polyurethane will last longer.
For decorative pots that will not be used for plants,
seal the INSIDE with a water-based polyurethane or craft acrylic sealant. I suggest this
because oil based products are flammable and the clean-up is easier with water based
products.
For candle pots you should glaze and fire the inside
of your pot. This is the only way to prevent the candle flame from burning the terra
cotta. If you really want to make a candle pot, try locating a paint-it-yourself pottery
studio and ask if they will glaze and fire the inside of your pot(s).
If you purchase Plaid Decorator Blocks, (available in limited
quantities-try a Google search), to decorate your pot, they come with a pattern suggestion
sheet and how-to instructions. You can also buy more than one set of blocks and mix
patterns and shapes. Plaid does offer their products for sale at their web site. See
below for specific pattern suggestions.
To decoupage your flower pot, pick any wrapping
paper, wall paper, greeting card, or fabric, etc., that you like and make a color copy of
it. PLEASE NOTE: Ink Jet printed images will smear. To
decoupage your design onto the flower pot, carefully cut-out the shapes you want to use
and adhere them to the pot with Mod Podge, (also by Plaid), available at craft stores.
When you're finished decorating/painting your flower
pot, let it dry thoroughly, overnight is best. Then seal the outside with a water based
polyurethane 2-3 coats. There are several of these on the market, available at craft,
hardware and paint stores. Check to see if the product you select is OK to use over a
painted surface. I stress water based polyurethane because oil based products have a
yellow tint and will likely discolor your design. Mod Podge is a good sealant as well as
an adhesive. (It does leave a slightly tacky feeling to the touch).
 |
CLICK HERE FOR A PRINTER
FRIENDLY VERSION OF THESE INSTRUCTIONS. YOU WILL NEED ADOBE ACROBAT READER TO OPEN AND
PRINT THE PAGE. DON'T HAVE ADOBE ACROBAT READER? IT'S FREE!
JUST CLICK THE "GET ACROBAT READER" BUTTON FOR THE DOWNLOAD. |
|
CARE
TIPS
Protect your flower pot from the elements
If it's cold where you live, store your flower pot in
a warm, dry place during the winter months.
If you use your pot for a living plant, after
watering your plant, DO NOT allow the pot to stand in water. If you notice water sitting
in the saucer after watering, pour it out. Remember, painted surfaces do not stand-up to
extensive exposure to water.
Clean your pot, if necessary, with a soft damp cloth.
No scrubby pads or abrasive cleaners. They will scratch the finish.
|
STILL NEED MORE INFORMATION?
If you would like ideas, or painting patterns, here are
few more publications that I have used.
Leisure Arts - Patio Pots - #1741
Plaid - Helen's Pots & Mailboxes - Fun to Paint #9232
Design Originals - Garden Angels & Mice #3119
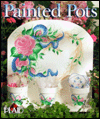
Design Originals - Painted Pots - #2361
Design Originals - Garden Guardians - #3170
Design Originals - Garden Delights - #3120
Plaid - Block Printing for Outdoor Living - Decorator Blocks #9197 |


